")

Table of Contents
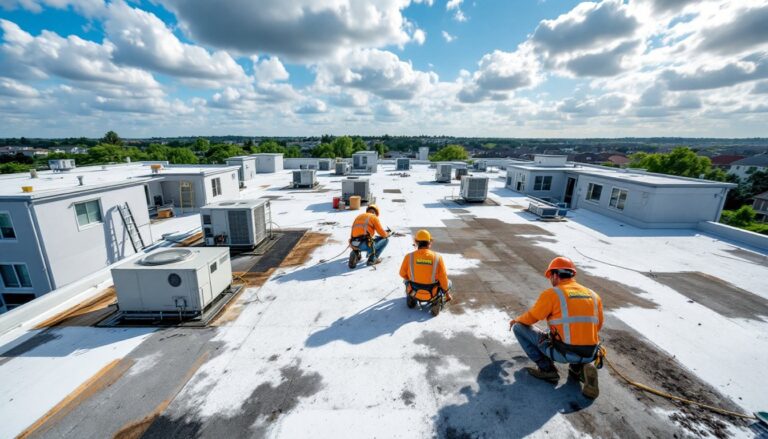
ToggleRoof damage doesn’t always mean calling a contractor, many common repairs are well within reach for a confident DIYer. Whether it’s a missing shingle, a slow leak, or damaged flashing, knowing how to spot the problem and fix it can save you hundreds of dollars and prevent water damage from getting worse. This guide walks you through assessing damage, gathering the right tools, and tackling repairs safely. We’ll cover what you can handle yourself and what signals it’s time to bring in a professional.
Key Takeaways
- Assess roof damage from the ground using binoculars, then inspect your attic for water stains to pinpoint the true location of leaks before attempting repairs.
- Missing shingles, small holes, and curled shingles are manageable DIY roof repairs that can save hundreds of dollars when handled safely and correctly.
- Gather essential tools and materials—including replacement shingles, roofing nails, roofing cement, and a sturdy ladder—before starting any how to repair a roof project.
- Always prioritize safety with proper PPE, a correctly angled ladder, a helper, and avoid working in wet, windy, or extreme heat conditions.
- Call a professional contractor for structural damage, widespread leaks, rot, or damage beyond your skill level rather than risk injury or costly mistakes.
Assess Your Roof’s Damage
Before you grab a ladder, figure out what you’re dealing with. Start from the ground using binoculars, scan for missing, curled, or cracked shingles, visible holes, and areas where the roof line sags. Check your attic or crawl space on a dry day: water stains on rafters, insulation, or drywall tell you where water is entering, even if the entry point isn’t obvious from above.
If you spot active leaking during rain, mark the spot with a bright marker or tape so you can find it again. Water travels downhill inside walls and cavities, so the leak location from inside may be several feet from where water enters the roof. Missing shingles or flashing are straightforward, you’ll see them. Curling or blistering shingles mean the adhesive is failing and those sections need replacement soon. Small punctures or holes from branches or foot traffic can be patched: larger damage or widespread deterioration signals the roof is near end-of-life.
Check the age of your roof. Asphalt shingles typically last 15–20 years: if yours is older and you’re seeing damage, replacement might be smarter than repair. Look for granule loss (bare spots where asphalt shows through) and moss or algae growth, which indicate moisture problems and aging.
Note any areas that are hard to access, icy, or at steep pitches. These demand more caution, or professional help. A few missing shingles on a low-slope garage roof is a weekend project: the same damage on a steep peak three stories up is a different conversation entirely.
Gather Your Tools And Materials
You don’t need a truckload of gear, but having the right items makes the job safer and faster.
Tools:
• Ladder (extension or step, depending on roof height)
• Caulk gun
• Hammer and pry bar or flat bar
• Roofing knife or utility knife with fresh blades
• Cordless drill (helpful for flashing fasteners)
• Tape measure
• Trowel or putty knife
• Socket set or adjustable wrench (for flashing bolts)
• Flashlight or headlamp
Materials:
• Replacement shingles (get extras, match color and style, or they’ll show)
• Roofing nails (1¼-inch galvanized or stainless for asphalt shingles)
• Roofing cement or asphalt sealant (cartridge or tub, depending on repair size)
• Flashing patch kit or roll flashing if needed
• Caulk gun cartridges (roofing-grade)
• Roof sealant tape (self-adhesive, for temporary patches)
Before you buy replacement shingles, take a photo or grab a sample from a gutter or visible edge so you match the exact color and weight. Shingles fade: a year-old sample beats guessing. If you don’t know the original manufacturer, compare the thickness, color, and tab pattern at your local home center, staff can usually help match them.
Safety Preparation Before You Start
Roof work carries real risks. Fall injuries are serious, and no repair is worth broken bones.
Wear proper PPE:
• Work gloves (leather or rubber, depending on task, roofing surface is rough and hot)
• Safety glasses to protect from debris, nails, and splinters
• Slip-resistant boots with good grip
• A roof harness or fall arrest system if working on a steep slope or high roof (this is not optional on pitches above 6:12: check local safety codes)
• Sunscreen and a hat, you’ll be out there a while, often in direct sun
Before climbing:
• Check the weather. Don’t work in rain, strong wind, or extreme heat. Wet roofs are slippery: heat can soften and damage shingles.
• Use a sturdy, properly angled ladder (75-degree angle, or about 1 foot out for every 4 feet up).
• Have a helper hold the base or secure it with rope if possible.
• Never stand on the top rung: keep three points of contact (two hands, one foot: or two feet, one hand).
• Inspect your ladder for damage before using it.
On the roof:
• Move slowly and deliberately. Rushing causes slips.
• Avoid walking on icy, wet, or heavily weathered roof surfaces.
• Keep loose tools and materials within arm’s reach so you’re not stretching or reaching awkwardly.
• If you feel unsafe, stop. Hiring help for this step isn’t failure, it’s smart risk management.
Common Roof Repairs You Can Handle
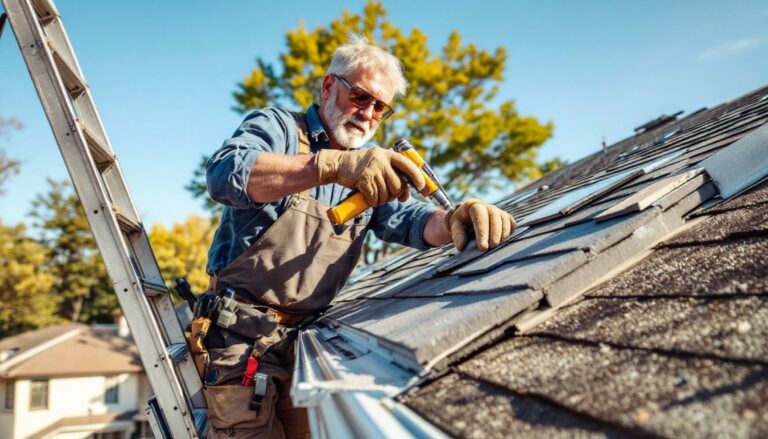
Fixing Shingle Damage
Missing or severely damaged shingles are the most common repairs. If just one or two shingles are affected, you can replace them without a full reshingling job.
Steps:
- Remove the damaged shingle. Locate the nails holding it down (usually 4 per shingle, near the top). Lift the shingle above it slightly and use a flat pry bar to carefully remove nails from the damaged shingle.
- Remove the shingle itself. Once nails are out, slide the damaged shingle down and away. If it’s stuck, gently pry the edges.
- Slide the new shingle in place. Position it so the bottom edge aligns with the shingles on either side and the top edge slides under the shingle above.
- Nail it down. Drive four 1¼-inch roofing nails through the slots (pre-marked holes) in the new shingle. Place them so the top of the nail sits just below the shingle surface, not driven so hard you crush the material.
- Seal the nail heads. Apply a small dab of roofing cement over each nail head to prevent water from seeping around the nail.
- Seal the upper edge. Lift the shingle above and run a thin bead of roofing cement along the top edge of the new shingle, then press the upper shingle down. This adhesive seals the gap.
If shingles are curled but not missing: Use roofing cement to re-adhere them. Lift the edge gently, apply cement underneath with a trowel, and weigh it down (a brick or board overnight) while it sets. Often this buys you time before full replacement is needed.
Patching Leaks And Small Holes
Small punctures, cracks, or areas where fasteners have pulled through can be sealed without replacing the entire shingle.
For small holes or cracks:
- Clean the area. Brush away debris and algae. A wire brush or cloth works fine.
- Apply roofing cement. Use a caulk gun or trowel to apply asphalt roofing cement directly into the hole or along the crack. Work it in so it fills completely.
- Smooth it out. Use a putty knife to level it flush with the surrounding surface.
- Let it cure. Drying time varies (check the product label): most cure in 24 hours but resist rain within the first few hours.
For flashing leaks (around vents, chimneys, skylights):
Flashing is metal trim designed to channel water away. If the sealant has cracked or failed, water will seep under it. Scrape out the old, dried sealant, clean the area with a brush, and re-caulk with roofing cement or silicone caulk rated for outdoor use. If flashing is bent, rusted, or has holes, it needs replacement, a job best left to professionals because flashing removal and replacement involves disturbing shingles and requires waterproofing skill.
When to stop and call a pro:
If you notice structural damage (rotted decking, sagging roof line, multiple large holes), widespread leaking that stains several rooms, or damage from falling tree limbs, you’ve moved beyond DIY territory. Structural damage requires permits and professional assessment. A comprehensive resource on roof repair cost guidance can help you understand when professional work is justified and what you might expect to pay.
For homeowners building a seasonal maintenance checklist, resources on home maintenance offer broader guidance on keeping roofs in good condition year-round. Similarly, detailed roof repair fundamentals are covered in comprehensive guides on roof repair basics, which provide alternative perspectives if you want a second reference.
Conclusion
Repairing a roof yourself requires care, the right tools, and realistic self-assessment. A few missing shingles or a small leak are manageable projects that save money and build confidence. But don’t confuse DIY-friendly repairs with structural work, water damage, rot, or widespread failure belong with professionals. Stay safe, prep thoroughly, and know when to call for backup. Your roof will thank you.