")

Table of Contents
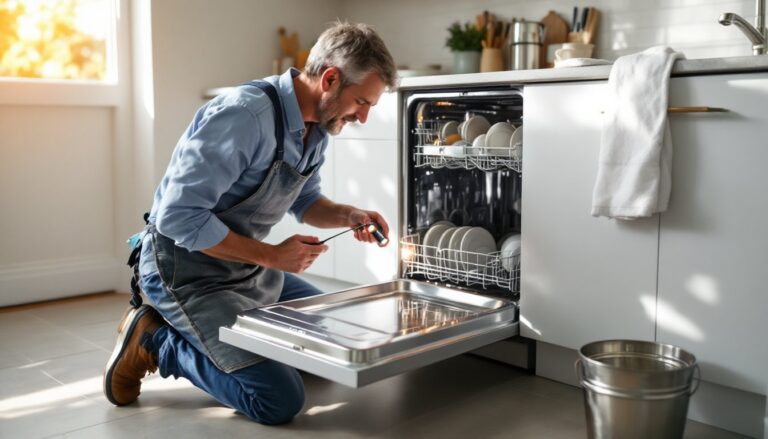
ToggleA leaking KitchenAid dishwasher or one that won’t drain can turn a convenience into a headache, but many issues don’t require calling a technician right away. Before you schedule an expensive service call, you can troubleshoot and fix several common KitchenAid dishwasher problems yourself with basic tools and about an hour of your time. This guide walks you through the most frequent issues homeowners encounter, from clogged spray arms to worn door seals, and shows you which repairs you can safely handle at home versus when to bring in a professional. Whether your machine is leaving water pooling at the bottom or dishes aren’t getting clean, these practical fixes will get your dishwasher running again.
Key Takeaways
- Many common KitchenAid dishwasher repair issues like clogs, worn seals, and drainage problems can be fixed at home with basic tools in about an hour, saving you an expensive service call.
- Always unplug or turn off your dishwasher at the circuit breaker before attempting any repairs to prevent electrical shocks and injuries.
- Clearing the sump, unclogging spray arms, and inspecting drain hoses are the first troubleshooting steps that resolve most KitchenAid dishwasher drainage and cleaning problems.
- A leaking dishwasher door is typically caused by a deteriorated rubber gasket that can be replaced by homeowners for $40–$120, making it one of the most straightforward repairs.
- Professional repair service is necessary for motor/pump failures, control board issues, and error codes that persist after basic troubleshooting and drain line cleaning.
- Regular maintenance like checking water temperature (at least 120°F), cleaning detergent dispensers, and maintaining the door seal ensures your KitchenAid dishwasher operates efficiently for 10+ years.
Common KitchenAid Dishwasher Problems and How to Spot Them
Most KitchenAid dishwasher failures fall into a handful of recognizable patterns. Water pooling on the floor beneath the unit usually signals a leak in the pump seal, inlet valve, or door gasket. If dishes come out wet or covered in food residue, your spray arms are likely clogged, or the filter basket needs cleaning. A dishwasher that runs but doesn’t drain is one of the most common complaints, water sits stagnant at the bottom after the cycle ends.
Other telltale signs include strange noises during operation (typically a worn pump or foreign object in the sump), a door that won’t latch properly, or visible mold and odor around the rubber gasket. Pay attention to whether the problem appeared suddenly or developed over weeks. Sudden failure often points to a discrete component like a valve or seal: gradual performance decline usually means buildup or wear.
Before diagnosing anything, always unplug the dishwasher or turn it off at the circuit breaker. Never attempt repairs with the machine powered. This simple safety step prevents electrical shocks and injuries, no exceptions.
Before You Call a Technician: Basic Troubleshooting Steps
Start with the easiest checks. Remove the bottom rack and inspect the sump (the basin at the floor of the tub) for food debris, glass shards, or objects lodged there. Use a small flashlight and a straightened wire coat hanger to fish out anything blocking the drain. This five-minute step fixes more dishwashers than most people realize.
Next, verify your water temperature. KitchenAid dishwashers perform best when water entering the machine is at least 120°F (49°C). Check your home’s water heater setting and run the kitchen sink hot water for 30 seconds before starting a wash cycle to ensure hot water reaches the dishwasher inlet. Cold incoming water reduces detergent effectiveness and leaves films on dishes.
Examine the detergent dispensers. Old, caked detergent or a spring-loaded door that won’t open properly prevents soap from entering the wash. Empty and wipe down both the main wash dispenser and the rinse-aid dispenser with a damp cloth. Make sure the dispenser door closes snugly and latches.
Check the inlet fill valve, the small solenoid valve that lets water into the tub at the bottom-left corner (when viewing from the front). Listen for a clicking sound when you start a cycle. No click means the valve isn’t firing: a weak or slow fill indicates a clogged screen inside the valve inlet.
How to Unclog Spray Arms and Filters
Spray arms that don’t rotate or squirt water are usually clogged. Remove the bottom rack to access the lower spray arm, and the top rack to reach the upper spray arm (a plastic assembly with tiny holes along its length). Gently pull or unscrew each arm from its center post, the method depends on your model.
Hold each arm under warm running water and push through the holes with a straightened paperclip or small wire to dislodge food and mineral deposits. A soaking in a cup of white vinegar for 15 minutes helps dissolve mineral buildup if you live in a hard-water area. Reinstall the arms, ensuring they rotate freely without obstruction.
The mesh filter basket at the bottom of the tub traps large food particles. Remove it by twisting counterclockwise and rinse under running water using a soft brush. KitchenAid models often have a secondary fine-mesh filter above the main filter, remove and rinse this as well. A clogged filter reduces drainage and forces water and food back onto dishes.
Fixing Water Drainage Issues
If water remains in the tub after the cycle completes, the first culprit is typically the drain line itself. Locate the rubber drain hose underneath the dishwasher (usually a 1-inch diameter corrugated hose running to your sink’s P-trap or garbage disposal outlet). Crimp or kinks in this hose restrict flow. Straighten any bent sections carefully without cracking the rubber.
Inspect where the drain hose connects at both ends. Food debris and mineral deposits accumulate at these connection points. Loosen the hose clamps with a screwdriver and carefully disconnect the hose. Hold it over a bucket, residual water will drain. Flush the interior with a flashlight to spot obstructions, and use a plumbing snake or flexible wire to clear blockages. Reconnect and tighten clamps securely to prevent leaks.
If the hose is clear but water still won’t drain, the problem likely lies in the pump or motor assembly. These components are more involved to replace and often require specialized tools. At this point, consulting the dishwasher’s service manual or calling a technician is the practical choice, attempting disassembly without guidance risks further damage.
Another common culprit is a blocked or clogged drain pump inlet screen located inside the tub where the pump connection sits. How to Fix a Dishwasher That Won’t Drain provides detailed steps for clearing this screen. Many homeowners report that removing a single piece of glass or a twist-tie from this location solved their drainage issue entirely.
Replacing Worn Door Seals and Latches
A leaking door is easy to spot: water pools around the base of the dishwasher during operation. The rubber gasket (also called a door seal) deteriorates over time, losing its pliability and no longer sealing tightly. Mold or visible cracks in the gasket confirm it needs replacement.
Gasket replacement is one of the most straightforward repairs a homeowner can do. KitchenAid gaskets typically cost $40–$120 depending on the model. Unplug the dishwasher, open the door fully, and locate the gasket seated in the groove around the door’s inner edge. It usually pulls out by hand, though you may need a flat-head screwdriver to gently pry one end free. Buy a replacement gasket specific to your model number (stamped on the inside edge of the door frame or in your manual).
Install the new gasket by pressing it firmly into the groove, starting at the top center and working down both sides, then across the bottom. Make sure it sits evenly without twists or gaps. Close the door gently and check that it latches smoothly without excessive resistance.
If the door itself doesn’t close or latch properly, the latch mechanism may be bent or broken. These plastic latches can crack if the door is slammed or if the cabinet has shifted. Replacement latches are inexpensive ($15–$30) and mount with two or three screws on the inside top of the door. Unscrew the old latch, pull away any attached springs, and install the new one following your model’s manual. Proper latch tension ensures the gasket compresses evenly and water doesn’t escape.
When to Call a Professional Repair Service
Certain failures require professional intervention. Motor or pump replacement, control board failures, and issues with pressurized water jets inside the tub all involve specialized diagnostics and tools. If you’ve cleared the drain line, verified water supply, and cleaned spray arms but water still won’t drain, the pump motor is likely faulty, this isn’t a home repair.
A dishwasher that fills but never starts a cycle or displays error codes points to an electronic control problem. Modern KitchenAid models use complex control boards that communicate with multiple sensors. Diagnosing these issues requires technical training and troubleshooting software you don’t have.
Also consider the dishwasher’s age and warranty status. Repairing a 10-year-old model with a $400 pump assembly rarely makes financial sense compared to replacement. A newer unit within warranty should go back to KitchenAid service or an authorized dealer to preserve coverage.
KitchenAid Dishwasher Not Draining? 7 Reasons & How to Fix walks through seven common drainage causes and when professional repair becomes necessary. 6 Common Dishwasher Problems and How to Fix Them Yourself also outlines the boundary between DIY-friendly fixes and jobs best left to technicians.
When you do call a professional, have your model number ready and describe exactly what happens during operation, does it fill? run the cycle? attempt to drain? This information helps the technician diagnose faster and order the correct parts.
Conclusion
Most common KitchenAid dishwasher issues stem from clogs, worn gaskets, or simple maintenance oversights, all solvable in an afternoon with basic tools. Start with troubleshooting: clear the sump and drain line, check spray arm rotation, and inspect the door seal. If those steps don’t resolve the problem, professional service is worth the investment. A well-maintained dishwasher easily lasts 10+ years, so don’t hesitate to invest in repairs when the cost justifies it.