")

Table of Contents
ToggleA GFCI outlet stops working, and you’re wondering if you’ve got an electrical emergency on your hands. The good news: most GFCI outlet repairs are straightforward enough for a handy homeowner to tackle. These outlets are designed to shut off power instantly when they detect a ground fault, protecting you from electrical shock, and they fail for predictable reasons. This guide walks you through testing, troubleshooting, and fixing a GFCI outlet yourself, plus when to call a professional. You’ll save money on service calls and understand a critical piece of your home’s electrical safety system.
Key Takeaways
- A GFCI outlet repair is typically straightforward for homeowners when a TEST button fails to trip or a RESET button won’t restore power, both clear signs the outlet needs replacement.
- Always turn off the breaker and verify power is off with a non-contact voltage tester before touching any wires during a GFCI outlet repair.
- Match wire colors to the correct terminals: black (hot) to brass, white (neutral) to silver, and bare copper (ground) to green, then tighten all screws firmly to prevent arcing.
- Test the repaired GFCI outlet by pressing TEST to trip it and RESET to restore power; if the TEST button doesn’t trip, double-check all wire connections for looseness or reversal.
- Call a professional electrician if the outlet trips constantly, the breaker trips on restoration, you find water in the outlet box, or the wire insulation is severely damaged.
- A working GFCI outlet is required by building code in kitchens, bathrooms, and outdoor areas, protecting your home from electrical shock and potential liability issues when selling.
What Is a GFCI Outlet and Why It Matters for Your Home
A GFCI (ground fault circuit interrupter) outlet is a specialized receptacle that protects against electrical shock by monitoring the balance of current flowing in and out of the circuit. If it detects a mismatch, called a ground fault, it trips the outlet and cuts power within milliseconds. You’ll find them required by building code in kitchens, bathrooms, garages, and outdoor areas where water exposure makes electrocution risk highest.
Unlike a standard outlet, a GFCI has TEST and RESET buttons on its face. The TEST button intentionally creates a ground fault so you can verify the outlet is working. The RESET button restores power after a trip. Modern GFCIs (manufactured after 2015) have even better sensitivity and won’t nuisance-trip as easily as older models, but they still fail occasionally due to age, moisture, or power surges.
Why this matters: a non-functioning GFCI puts you at risk, especially in wet areas. Water is an excellent conductor, and a regular outlet in a bathroom or kitchen offers zero shock protection. A working GFCI is your first line of defense against ground-fault injuries, and it’s a code requirement, so if your home inspector finds a missing or broken one, you may face liability issues when selling.
Signs Your GFCI Outlet Needs Repair
The most obvious sign is a tripped outlet: you press the RESET button and nothing happens, or the outlet won’t stay reset. Alternatively, the TEST button may not trip the outlet at all, indicating the outlet has failed and can no longer detect ground faults. Both scenarios mean the outlet needs replacement.
Other red flags include intermittent power loss (the outlet works sometimes, then cuts off unpredictably), visible scorch marks or burn spots on the outlet face, or a burning smell near the outlet. These hint at internal arcing or moisture damage. If you notice the outlet trips constantly even with normal devices plugged in, without using the TEST button, the circuit may have a genuine ground fault somewhere (like damaged insulation in an appliance or within the wall), which is a separate problem requiring investigation, but the outlet itself is functioning as designed.
Don’t ignore these signs. A broken GFCI is a broken safety net. Test it monthly by pressing the TEST button: if it doesn’t trip, schedule a replacement or repair immediately.
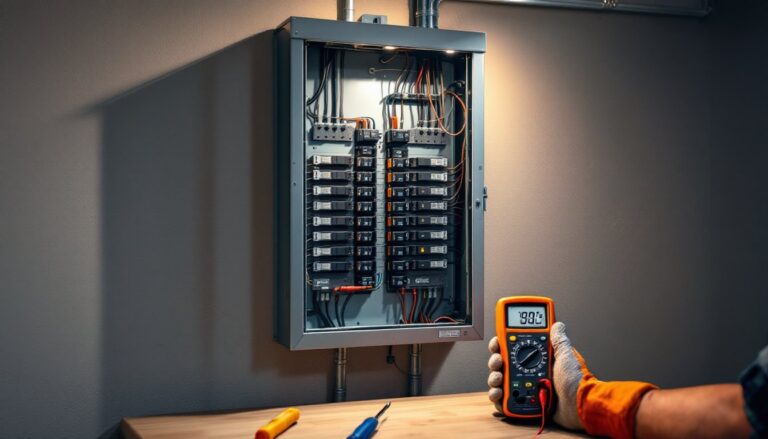
Tools and Materials You’ll Need
Tools:
• Non-contact voltage tester (essential for confirming power is off)
• Flathead and Phillips screwdrivers
• Needle-nose pliers (for working with wire terminals)
• Wire strippers (if you need to re-strip damaged wire)
• Flashlight or headlamp
• Optional: multimeter for advanced testing
Materials:
• Replacement GFCI outlet (15-amp or 20-amp, depending on your circuit)
• Wire nuts (if any connections need remaking)
• Electrical tape
Safety gear:
• Safety glasses
• Work gloves (nitrile or leather)
The non-contact voltage tester is non-negotiable. It detects live electricity without touching wires and is inexpensive ($10–$20). Never assume a breaker switch has actually cut power: always verify with the tester. If you’re replacing the outlet, match the amp rating printed on your circuit breaker. Most household outlets are 15-amp, but kitchens and some appliances use 20-amp circuits. A 15-amp outlet on a 20-amp circuit violates code and creates a fire hazard.
How to Test Your GFCI Outlet Before Repair
Step 1: Confirm the outlet is powered. Plug a lamp or phone charger into the outlet. If it lights or charges, power is present. If nothing happens, the outlet may already be off, or something upstream (the breaker) has tripped.
Step 2: Press the TEST button. Hold it down for a second. A functioning GFCI should trip immediately, the outlet cuts power to anything plugged into it and to any standard outlets downstream (if this GFCI is the first outlet on the circuit, called a “master”). The lamp or charger stops working. If nothing happens, the GFCI has failed internally.
Step 3: Press RESET. The outlet should restore power and your lamp/charger should work again. If RESET does nothing, or if it resets but TEST doesn’t trip it again a second time, the outlet is definitely faulty.
Step 4: Check for a tripped breaker. If the outlet is completely dead and pressing RESET does nothing, the problem may be upstream. Go to your breaker panel and look for any breaker in the OFF position or in a midway “fault” position. Flip it fully OFF, then back ON. Sometimes a breaker trips due to a ground fault on the circuit, protecting the whole line. If it trips again immediately, there’s an active ground fault in a downstream device or wire, and you should call an electrician to track it down.
Step-by-Step GFCI Outlet Repair Process
Step 1: Turn off the breaker. Locate the breaker controlling that outlet in your panel. Flip it fully to the OFF position. Go back to the outlet and test it with your non-contact voltage tester to confirm power is off. If you’re working on a bathroom or kitchen outlet, multiple breakers may feed that area, so test all of them if unsure.
Step 2: Remove the outlet cover. Unscrew the single screw holding the faceplate and set it aside.
Step 3: Unscrew the outlet from the box. Two screws hold the outlet to the electrical box. Remove both and carefully pull the outlet out so you can access the wire terminals.
Step 4: Disconnect the wires. You’ll see two or three wires: black (hot), white (neutral), and bare copper (ground). Loosen each terminal screw counterclockwise and pull out the wires. Note the original positions, taking a photo helps. Some outlets have “LINE” and “LOAD” terminals: LINE is the incoming power, LOAD feeds downstream outlets. If this is a replacement, match the new outlet’s wiring to the original configuration.
Step 5: Inspect the wires and terminals. Look for scorch marks, corrosion, or stripped insulation. If the wire insulation is damaged, cut back 1/2 inch with wire strippers and re-strip fresh copper. If the wire is severely burned or corroded, replace that section with new wire of the same gauge (usually 12 or 14 AWG) connected to the old wire using wire nuts. Wrap the connection tightly with electrical tape.
Step 6: Connect the new outlet. Strip 1/2 inch of insulation from each wire. Insert the black (hot) wire into the brass terminal (or the one marked “HOT” on a GFCI), the white (neutral) into the silver terminal, and the ground wire into the green terminal. Tighten each screw firmly, a loose connection can cause arcing and outlet failure. Gently push the outlet back into the box without bending the wires sharply.
Step 7: Screw the outlet to the box and install the faceplate. Tighten the two mounting screws evenly. Screw the cover plate back on.
Step 8: Restore power and test. Go back to the breaker and flip it ON. Return to the outlet. Plug in a lamp to confirm power. Press TEST, the outlet should trip immediately. Press RESET and verify the lamp comes back on. If the TEST button doesn’t trip the outlet on the first try, turn off the breaker again, remove the outlet, and double-check your wire connections. Loose or reversed wires prevent the GFCI from functioning.
For additional guidance on the replacement process, resources like how to replace a GFCI outlet provide detailed photo walkthroughs. If you’re troubleshooting an outlet that won’t reset, the GFCI outlet not working guide covers common failure modes and next steps.
When to Call a Professional Electrician
Call an electrician in these situations:
• The GFCI trips constantly (within seconds of pressing RESET), even with nothing plugged in. This suggests a ground fault in a downstream wire or appliance, not the outlet itself.
• The breaker trips when you restore power, preventing you from even testing the outlet. Again, this indicates a live fault on the circuit.
• You see water inside the outlet box or smell moisture. Wet electrical work is beyond DIY: moisture and electricity can cause fires or deadly shocks.
• The wire insulation is severely damaged or you’re unsure about the wire gauge or circuit type. Mixing incompatible components creates fire and shock hazards.
• The outlet box is cracked, loose, or corroded. The box itself may need replacement.
• You’re not confident turning off the breaker or testing for power. Electricity deserves respect. A licensed electrician can handle it safely and ensure code compliance.
Electrical codes vary by jurisdiction. Some areas require a licensed electrician for any outlet work: others allow homeowner repairs. Check your local building department before starting. If you’re renting, check your lease and notify your landlord or property manager. Complete guides on GFCI outlet replacement often include safety notes and when to escalate to a professional.
Conclusion
A broken GFCI outlet is fixable in an afternoon with basic tools and a methodical approach. Testing before you open the wall, turning off the breaker, and double-checking your wire connections will get you 90% of the way there. Stay safe, respect electricity, and don’t hesitate to call in a pro if the problem is bigger than a simple outlet replacement.