")
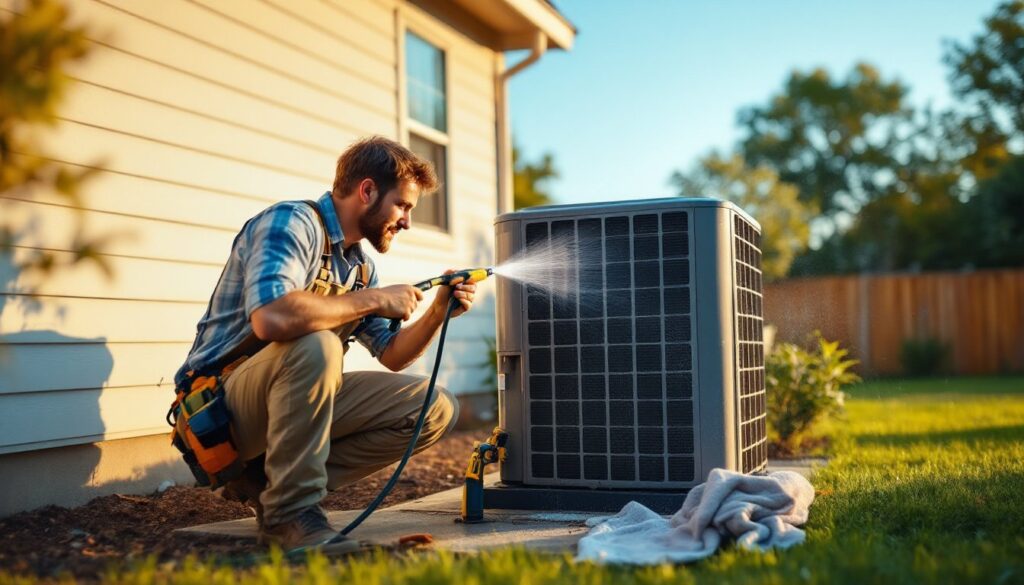
Table of Contents
ToggleSpring, Texas summers are no joke. Temperatures regularly climb past 95°F, and your air conditioning system becomes non-negotiable for comfort and safety. The good news? A little preventive AC maintenance in Spring, TX before the heat hits can save you hundreds in emergency repairs and keep your unit running efficiently all season. Most homeowners don’t realize that routine upkeep, cleaning filters, clearing debris, checking thermostat settings, takes just a few hours and prevents breakdowns that’ll leave you sweating in July. Let’s walk through the essential maintenance steps you can tackle yourself, plus when it’s time to bring in a professional.
Key Takeaways
- Spring AC maintenance in Spring, TX prevents costly emergency repairs and keeps your system running efficiently through Texas summers where temperatures regularly exceed 95°F.
- Cleaning or replacing your air filter every 30 days (for 1-inch filters) or every 6–12 months (for 4-inch filters) can reduce energy use by 5–15% and protects your entire cooling system.
- Clearing debris from your outdoor condenser unit and straightening bent fins twice yearly ensures optimal airflow and reduces system wear.
- Verify your thermostat settings for cooling mode, fan operation, and temperature accuracy before summer; a modern programmable or smart thermostat can pay for itself within a year through energy savings.
- Professional AC tune-ups ($150–$300 in the Spring, TX area) check refrigerant levels, electrical connections, compressor performance, and ductwork to catch problems early and ensure peak efficiency.
- Call a licensed HVAC technician immediately if your system won’t cool, makes unusual noises, shows visible leaks, emits electrical smells, or has ice buildup—these warning signs prevent costly system failures.
Why Spring AC Maintenance Matters
Your AC unit works harder in Texas heat than it does in most of the country. Dust, pollen, and debris accumulate over the off-season, and components that weren’t used for months need a once-over before you run them continuously. Catching small problems now, a refrigerant leak, a failing capacitor, or debris clogging the condenser coils, prevents a complete system failure on the hottest day of the year. Spring maintenance also extends your unit’s lifespan: a well-maintained AC system lasts 12–17 years, while neglected ones fail closer to 8–10 years. Beyond longevity, clean and properly tuned systems operate at peak efficiency, which directly lowers your energy bills. Skipping this step isn’t just lazy, it’s expensive.
Clean or Replace Your Air Filter
This is the easiest and most critical maintenance task. Your system’s air filter traps dust, pet hair, and pollen: a clogged filter forces your AC to work harder, raising energy costs and reducing cooling performance.
What you’ll need:
• Replacement filter (confirm size, common sizes are 16×25×1, 20×25×1, or 16×25×4)
• Flashlight
• Notepad to record the filter size
Steps:
- Turn off your system at the thermostat before touching the filter.
- Locate the filter. It’s typically in a return air duct or blower compartment near the furnace or air handler (often in an attic, basement, or utility closet).
- Note the size printed on the frame: this tells you what replacement to buy.
- Slide out the old filter and inspect it. If it’s dark or visibly clogged, it needs replacing.
- Insert the new filter with the airflow arrow pointing toward the system.
- Restart your AC.
If your filter looks clean but hasn’t been changed in three months, swap it anyway. In dusty or pet-heavy homes, check every month during cooling season. A 1-inch filter typically needs replacing every 30 days: a 4-inch pleated filter lasts 6–12 months depending on air quality. This one task cuts energy use by 5–15% and protects your entire system.
Inspect and Clear Your Outdoor Unit
Your AC’s outdoor condenser unit is exposed to leaves, twigs, grass clippings, and dirt. These block airflow and reduce efficiency.
What you’ll need:
• Garden hose
• Soft brush or old toothbrush
• Fin comb (optional, ~$10–20, for straightening bent coils)
• Work gloves
• Towels
Steps:
- Turn off the unit at the breaker before doing any work.
- Clear debris around the unit. Trim back shrubs, grass, and vegetation to at least 2 feet on all sides.
- Gently brush away loose dirt and leaves from the fins (the thin aluminum blades on the sides).
- Use your garden hose on low pressure to spray the coils from inside out, flushing out dust. Don’t use high pressure, you’ll bend the delicate fins.
- If fins are slightly bent, a fin comb straightens them: bent fins block airflow and hurt efficiency.
- Let everything dry, then restore power.
Avoid spraying directly into the compressor (the large cylindrical section). The goal is to clean the cooling coils without damaging components. Do this twice a year, once in spring and once in fall. A clean outdoor unit reduces wear and keeps your system running efficiently.
Check Your Thermostat Settings
Your thermostat controls how hard your system works. Before summer kicks in, verify settings and calibration.
What to check:
• Temperature accuracy: Hold a separate thermometer against the thermostat display for five minutes. If readings differ by more than 1°F, recalibration may be needed (older analog units especially drift over time).
• Mode settings: Confirm it’s set to “cooling” mode, not “heat” or “auto.” Auto mode can trigger heating in spring, wasting energy.
• Fan mode: Set to “auto” rather than “on” so the fan runs only when cooling is active. “On” runs the fan constantly and inflates energy use.
• Programmable features: If you have a programmable or smart thermostat, test the schedule to ensure it aligns with your routine.
• Differential: The temperature swing between when cooling kicks in and shuts off should be 1–2°F. Larger swings cause rapid cycling and higher bills.
If your thermostat is 10+ years old or seems unreliable, replacing it with a modern programmable or Wi-Fi-enabled model can pay for itself within a year through energy savings. Smart thermostats let you control cooling remotely and track usage patterns. This simple check prevents unnecessary strain on your system.
Schedule Professional AC Service
While DIY maintenance handles the visible stuff, your AC system has internal components, refrigerant levels, electrical connections, compressor performance, and ductwork efficiency, that require specialized tools and training to assess safely and accurately.
What a professional tune-up includes:
• Refrigerant charge check and adjustment if needed
• Electrical connections and capacitor inspection
• Compressor and motor performance testing
• Coil inspection and chemical cleaning if required
• Ductwork inspection for leaks or blockages
• System efficiency evaluation and recommendations
Professional servicing costs $150–$300 in the Spring, Texas area, depending on complexity and contractor rates. Scheduling in late April or early May, before peak season demand, gives you priority and avoids the July emergency rush. Many HVAC contractors offer seasonal tune-up packages that cover both spring and fall checks at a discount. The top HVAC professionals in Spring, TX can be found through local reviews, and platforms like HomeAdvisor help you compare costs and get free estimates. This investment catches problems early and ensures your unit operates at peak efficiency.
When to Call an HVAC Professional in Spring
Some problems you can’t fix with a filter and hose. Call a licensed HVAC technician immediately if:
• Your system won’t cool: The house stays warm even though the unit is running. This often signals low refrigerant or a compressor issue.
• Unusual noises: Grinding, rattling, or squealing suggest mechanical failure or bearing wear.
• Visible leaks: Refrigerant or condensation leaks indicate a sealed-system failure.
• Electrical smell or discoloration: Burnt smells or scorched components mean wiring or motor trouble.
• Ice buildup on coils or lines: This points to refrigerant, airflow, or sensor problems.
• High utility bills with no usage change: Declining efficiency often precedes total failure.
Don’t ignore warning signs hoping they’ll go away. HVAC repair costs escalate quickly when issues compound. If your unit is 12+ years old, even routine repairs might signal that replacement is more economical long-term. A professional assessment clarifies whether repair or replacement makes sense. Resources like Today’s Homeowner provide seasonal repair guides and diagnostic tips, though professional diagnosis and repair require licensed technicians. In Texas, HVAC work often requires permits and inspections: licensed contractors handle compliance so you’re protected. Spring AC maintenance prevents most emergency calls, but knowing when to stop DIYing and call the pros protects both your system and your wallet.
Conclusion
Spring maintenance takes a weekend and costs under $100 in parts. A little effort now saves thousands in emergency repairs and keeps your system running efficiently through sweltering Texas summers. Filter changes, outdoor unit cleaning, thermostat checks, and professional servicing form a complete defense against July breakdowns. Your future, cooler self will thank you.