")

Table of Contents
ToggleYour roof doesn’t need to be a perfect storm away from disaster. Many homeowners think every roof problem demands a professional, but minor roof repairs, loose shingles, small leaks, and flashing gaps, are absolutely within reach if you’re willing to climb a ladder and follow a clear plan. This guide walks you through which repairs you can tackle yourself, what tools and materials you’ll need, and the critical safety steps that keep the job manageable and injury-free. Even cosmetic fixes improve your roof’s lifespan and prevent small issues from becoming expensive ones.
Key Takeaways
- Minor roof repairs like loose shingles, small leaks, and flashing gaps can be tackled by homeowners without professional help if approached with proper planning and safety measures.
- Know your limits—DIY roof repairs work for cosmetic damage and localized issues on roofs under 10 years old, but structural damage, sagging sections, and high-pitched roofs require professional roofers.
- Essential tools for minor roof repair include an extension ladder, nail puller, hammer, caulk gun, safety glasses, and work gloves, plus quality materials like roofing cement, galvanized nails, and matching replacement shingles.
- Most roof leaks begin at flashing around vents, chimneys, and valleys; regular inspection and resealing with roofing-grade sealant prevents water damage before it spreads to insulation and framing.
- Prioritize safety by using proper ladder placement, anti-slip footwear, roof harness for steep pitches, and never working alone or during poor weather conditions.
When to Attempt a DIY Roof Repair Versus Calling a Professional
Not every roof problem is created equal. Know your limits before you climb.
DIY-friendly repairs include fixing individual damaged shingles, sealing small roof leaks that haven’t penetrated into the attic, resealing flashing around vents and chimneys, and clearing debris from gutters. These repairs don’t affect your roof’s structural integrity and rarely require permits. If your roof is less than 10 years old and the damage is cosmetic or localized to one or two spots, you’re a good candidate for the work yourself.
Call a professional for structural damage, widespread leaks, sagging sections, missing large sections of shingles, or any repair that requires climbing high-pitched roofs (anything steeper than a 6:12 pitch is genuinely dangerous for amateurs). Storm damage often involves multiple issues hiding under intact-looking shingles. Similarly, if your roof is nearing the end of its lifespan (20+ years for asphalt shingles) or shows signs of rot or mold, have a licensed roofer assess it. Many jurisdictions require permits for roof repairs, especially anything touching load-bearing members or the structural frame, check your local building department first.
Budget is real. Roof repair costs vary widely by region and repair type, so getting a professional estimate helps you decide whether DIY savings justify the risk and effort.
Essential Tools and Materials for Basic Roof Maintenance
You don’t need a contractor’s toolbox, but the right gear makes the job cleaner and safer.
Tools:
• Ladder (extension ladder at least 24 feet for typical single-story homes: ensure three-point contact always)
• Nail puller or pry bar
• Hammer
• Caulk gun
• Utility knife
• Work gloves (leather or nitrile)
• Safety glasses and dust mask
• Roof harness (optional but strongly recommended for steep pitches)
• Tape measure
Materials (keep common sizes on hand):
• Roofing cement (also called asphalt roofing sealant: gets tacky in heat, bonds shingles firmly)
• Roofing nails (typically 1¼-inch galvanized: match your existing shingle type)
• Replacement shingles (grab a few extras matching your roof color and style)
• Flashing repair tape or pre-cut flashing patches (for vent and chimney gaps)
• Roof patch material (fiberglass or rubber patches for small holes)
• Underlayment repair tape (ice-and-water shield for sealing underneath)
Don’t scrimp on quality. Cheap roofing cement fails faster in freeze-thaw cycles. Galvanized nails resist rust better than plain steel. Matching shingles prevents color mismatches that advertise the repair. A reputable hardware supplier can confirm the exact shingle type and color code if you bring a photo or sample.
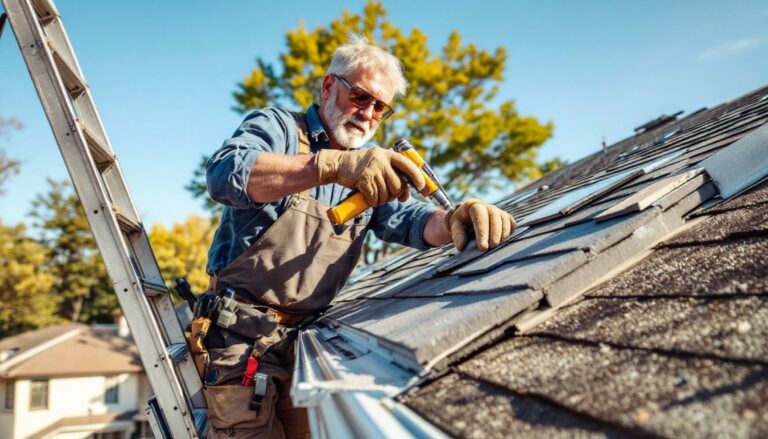
How to Fix Common Shingle Problems and Leaks
Most roof leaks start small. Catching them early saves thousands in interior damage.
Reseating or replacing a loose shingle:
- Position your ladder safely and inspect the problem shingle from above. Look for curling edges, missing sealant, or lifted tabs.
- Lift the shingle tab gently, don’t force it if it’s stuck. If nails are visible, note their positions.
- Remove old nails using a pry bar: pull straight out to avoid enlarging the hole.
- Apply a bead of roofing cement under the lifted tab and press it down firmly.
- If the shingle is cracked or torn beyond the nail area, replace it entirely. Slide the new shingle under the overlapping course above, nail it with four roofing nails (one near each corner), and seal over the nail heads with cement.
Patching a small roof leak or hole:
If water drips from the attic but the leak’s source isn’t obvious from above, look for water stains inside. Once you’ve located the source, mark it from below, then inspect from above. Small holes (pencil-eraser size) often hide under debris.
- Clean the area around the hole thoroughly: remove algae, dirt, and loose material with a brush.
- Cut a rubber roof patch slightly larger than the damage (at least 2 inches wider on all sides).
- Prime the area with roofing cement, then press the patch firmly into place, working from the center outward to remove air bubbles.
- Seal the patch edges with another coat of cement, feathering it out to prevent water pooling.
Let cement cure for 24 hours before exposure to rain. Minor repairs can prevent major water damage if addressed before leaks reach insulation or framing.
Sealing Roof Gaps and Preventing Water Damage
Flashing, the metal or rubber trim around vents, chimneys, skylights, and roof valleys, is where most roof leaks start. It fails silently, and by the time you notice water inside, damage is already spreading.
Resealing flashing around vents:
Look for dried, cracked, or missing sealant around vent flashing. The sealant should be smooth and flexible, not brittle.
- Use a utility knife to scrape away old, failing sealant down to bare metal or rubber.
- Wipe the area clean with a damp rag and let it dry completely.
- Apply a continuous bead of roofing cement or compatible flashing sealant around the base of the flashing, where it meets the roof.
- Smooth the bead with a wet finger or caulk tool for better adhesion and water shedding.
Sealing roof valleys:
Valley leaks happen where two roof slopes meet and water funnels downward. Debris collects here, trapping moisture.
- Clear all leaves, twigs, and silt from the valley.
- Inspect the valley flashing (usually pre-formed metal or shingles laid in a valley pattern).
- If the valley shows small gaps, apply roofing cement in a thin, uniform line along each edge where the shingles meet the valley metal.
- Do not caulk the center of a valley, water must flow freely downward.
Chimney and skylight flashing:
These joints are prone to failure because materials expand and contract at different rates. Inspect them twice yearly (spring and fall). If sealant is cracked or missing, reapply it. Never rely on silicone caulk on a roof: use roofing-grade sealant that remains flexible in temperature swings.
Safety Considerations When Working on Your Roof
Roof work has real hazards. Falls are not dramatic, they’re sudden and permanent.
Before climbing:
• Inspect your ladder for damage. Never lean a ladder directly against gutters: use a ladder stabilizer or standoff to keep it 12 inches away from the gutter line.
• Wear anti-slip work shoes with good grip: wet shingles are slippery.
• Apply a roof harness if your roof pitch exceeds 6:12 or if you’ll be working near an edge.
• Inform someone where you’re going and how long you expect to be on the roof. Never work alone.
• Avoid working during rain, wind over 15 mph, or if you’re fatigued.
Protective equipment:
• Safety glasses protect against debris kicked up while scraping or hammering.
• Work gloves protect your hands from sharp shingle edges and rough asphalt.
• Dust mask or respirator if you’re scraping old sealant or dealing with mold.
• Ear protection if using power tools.
Safe practices:
• Lay shingles and tools in your work area before starting, so you’re not reaching or stretching.
• Never hand-drive a nail near your body. If the hammer misses, injury is instant.
• Don’t leave debris or tools loose on the roof: they’re slip hazards and can blow away.
• Test the roof surface with your hand first. Sun-baked asphalt shingles can be hot enough to cause minor burns.
• If you feel unsafe or uncomfortable at any point, come down and reassess. Pride isn’t worth a broken leg.
Conclusion
Minor roof repairs are manageable if you’re honest about the scope and take safety seriously. Loose shingles, flashing gaps, and small leaks respond well to simple materials and basic tools. The payoff, extending your roof’s life and preventing costly interior water damage, is worth the afternoon’s work. When in doubt, call a professional. A roofer’s estimate costs far less than repairing rotted framing or mold.