")

Table of Contents
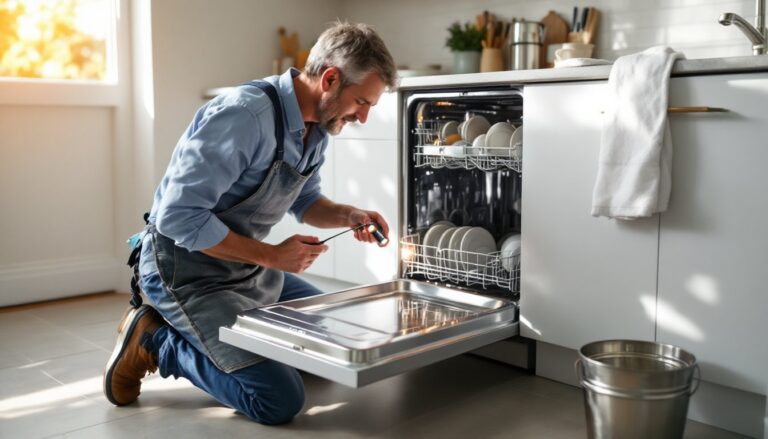
ToggleA KitchenAid dishwasher is a solid investment, but like any appliance, it needs occasional attention to keep running smoothly. If yours isn’t draining water, leaving dishes spotty, or running noisily, you don’t always need to call a technician right away, many common issues are straightforward fixes a homeowner can tackle. This guide walks through the most frequent KitchenAid dishwasher problems, how to diagnose them, and which repairs fall squarely in DIY territory versus when you should bring in a pro. Most problems come down to clogs, worn spray arms, or simple maintenance oversights that cost nothing to fix once you know what to look for.
Key Takeaways
- Most common KitchenAid dishwasher repair issues, including drainage clogs and poor cleaning performance, can be diagnosed and fixed by homeowners without calling a technician.
- Clean your dishwasher filter regularly and inspect spray arms for mineral deposits and damage, as these two maintenance tasks resolve the majority of performance problems.
- Always shut off power at the breaker before attempting any KitchenAid dishwasher repair, and call a professional if you encounter electrical issues, water leaks, or grinding sounds from the pump.
- For water drainage problems, check the drain hose for kinks, inspect the garbage disposal connection for food debris, and verify your water heater is set between 120°F and 140°F for optimal cleaning.
- Spray arm replacement typically costs $30–$80 and is one of the most cost-effective repairs that can immediately improve dishwasher cleaning performance.
Common KitchenAid Dishwasher Issues and Quick Diagnostics
Water Drainage Problems
A dishwasher that won’t drain is frustrating, but it’s often not the pump, it’s a blockage. The drain line, filter, or even the garbage disposal connection are the usual culprits. Start by listening: if the motor runs but water sits in the tub, you’ve got a flow restriction. Check the drain hose underneath the sink: it should run downhill to the disposal without kinks or pinches (nominal standard hose diameter is 3/4 inch). A trapped bend or compression can stop water cold.
Next, inspect the garbage disposal intake connection. Food debris can pack in there and block the path completely. If the disposal is relatively new or rarely used, this is easy to miss. Open the cabinet, locate where the hose connects to the disposal, and feel for blockage. Some homeowners forget that the disposal needs to run before the dishwasher drains into it: check that it’s actually working when you start a cycle.
Another common culprit is the drain pump impeller, a small spinning part that can jam with glass shards or hard food bits. If water drains slowly but not completely, or if you hear a grinding sound, suspect an impeller obstruction. A dishwasher not draining, including valve problems that may require replacement.
Cleaning Performance Issues
Dishes coming out spotty, cloudy, or with food residue points to two main problems: poor water circulation or inadequate water temperature. KitchenAid units rely on spray arms to distribute hot water at high pressure. If those arms aren’t spinning freely or their nozzles are clogged, water won’t reach all surfaces evenly.
Before you disassemble anything, run an empty cycle with a rinse aid booster (like Finish Jet Dry or equivalent store brands, not branded necessity, just what works for hard water). Many spotting issues vanish with proper rinse aid. If dishes are still dirty, the problem is likely spray arm performance or temperature.
Low water temperature is another silent performance killer. KitchenAid dishwashers typically need 120°F to 140°F incoming water to perform optimally. Check your home’s water heater: if it’s set below 120°F, increase it slightly (be safe about this, don’t exceed 140°F as it poses scalding risk). If your incoming water is cold, the heating element inside the dishwasher may be failing, and that’s a job for a technician.
Step-by-Step Repairs for DIY Homeowners
Cleaning and Unclogging the Filter System
The filter trap is the first line of defense. It catches food particles so they don’t recirculate or clog the pump. Most KitchenAid models have two filter components: a coarse mesh basket and a fine mesh insert that screws in below it. Cleaning them is the single easiest and most often-overlooked maintenance task.
Tools and materials needed:
- Damp cloth or sponge
- Warm water (no specialty cleaner required)
- Flashlight (helpful for spotting debris)
Steps:
- Remove the filter assembly by unlocking the coarse basket from the tub floor (usually a half-turn twist counterclockwise). Pull it straight up.
- Take out the fine mesh insert below it by unscrewing it. Inspect both for trapped debris, coffee grounds, food bits, and even small glass fragments hide here.
- Rinse both filters under warm running water, using your fingers or a soft brush to dislodge stubborn spots. Do not use abrasive scrubbers: they pit stainless steel.
- While the filter is out, shine a flashlight down into the sump (the recessed area below) and check for hidden debris. Remove anything with tweezers or a small brush.
- Reinstall the fine mesh insert first, screw it clockwise until snug (don’t over-tighten), then drop the coarse basket back in and turn clockwise to lock it.
- Run a short cycle to confirm water drains freely.
If the filter looks intact but water still drains slowly, the pump intake strainer may be blocked. This is underneath the filter: some models allow you to access it without removing the spray arm assembly. Check your model’s service manual (available free on KitchenAid’s site) for whether your unit supports this level of access.
Replacing Spray Arm Components
Spray arms distribute water at high pressure, and wear or clogs here directly hurt cleaning. If dishes aren’t getting clean and the filter is clear, suspect the spray arm. Fortunately, replacement is straightforward.
Tools and materials needed:
- KitchenAid spray arm assembly (lower and/or upper, depending on your model)
- Wrench or socket set (usually 7/32-inch or 1/4-inch socket needed)
- Warm soapy water
- Small brush or pipe cleaner
Access and inspection:
- Run a hot cycle for 2–3 minutes to warm the tub, then open the door and pull the lower rack out fully.
- Locate the spray arm hub in the center of the tub floor. The lower spray arm should lift straight up off its post: some models require a counterclockwise twist first. Consult your manual if unsure.
- Inspect the nozzle holes. Use a pipe cleaner or small wire to clear any mineral deposits or food slivers. If nozzles are cracked or the arm is warped, replacement is needed rather than cleaning.
- For the upper spray arm, pull the upper rack out, locate the hub above the rack, and remove the arm the same way.
Replacement steps:
- Remove the old arm from its hub post (twist counterclockwise or pull straight up, depending on design).
- Install the new spray arm by aligning it with the hub post and twisting clockwise (or pushing down, per your model’s design).
- Ensure the arm rotates freely. Spin it by hand: it should move without resistance.
- Run a full cycle and listen for any unusual noise, grinding or rattling means something isn’t seated properly.
Spray arm assemblies cost between $30 and $80 depending on the model. They’re one of the most cost-effective repairs and usually solve poor cleaning performance overnight. If water still isn’t reaching one side of the tub after a new spray arm, suspect a blocked inlet valve or a leak in the supply line, those are professional-level diagnostics.
When to Call a Professional Technician
Some problems demand a licensed technician. Know the line to avoid frustration and safety risks.
Call a pro if:
- The dishwasher won’t power on. A dead unit points to electrical issues (broken door latch switch, failed control board, or a wiring fault) that aren’t safe for DIY troubleshooting.
- Water leaks from the tub or seals. A failed door gasket or internal seal requires partial disassembly. While a gasket replacement is mechanical, accessing it involves removing panels. More importantly, a leak may signal a cracked tub or failed pump housing, which are warranty or replacement-level problems.
- The pump is making loud grinding or squealing sounds. This suggests bearing wear or internal damage. Running it further risks catastrophic failure.
- The heating element doesn’t work. Cold water cycles indicate a failed heating element. Replacing one involves draining the tub, removing fasteners, and proper electrical disconnect. It’s not complicated, but it’s risky if you’re unfamiliar with appliance electrical components.
- Repair requires a permit. In some jurisdictions, dishwasher installation or certain plumbing modifications (drain line relocation, for example) require permits. Check local codes. If you’re unsure, a licensed technician navigates this automatically.
Specific troubleshooting guidance for KitchenAid models can help you determine whether a symptom is a quick fix or a bigger problem. Technician calls typically run $150 to $300 for diagnostics and repair, depending on region and part costs. If your unit is over 10 years old and needs an expensive part, weighing repair cost against replacement is fair.
Safety note: Always shut off power at the breaker before attempting any internal repair, even if the unit is “just” a clogged filter. Unplug the electrical connection under the sink if accessible. Never reach into the tub while the cycle is running, and always remove the racks and spray arms before deep cleaning.